This tutorial teaches you how to update the internal software of your ConnectHub or ConnectHub GEO through a few easy steps.
ConnectHub and ConnectHub GEO update guide
1. Check if an update is necessary
The first step is to check with bConfig, our mobile configuration app, if you have to do an update. bConfig is available for Android and iOS, make sure to download it. When you have bConfig on your phone, you are ready to check if your ConnectHub or ConnectHub GEO is up-to-date.
- Press the "Scan" button
- Click on the name of the ConnectHub or ConnectHub GEO you want to check and connect to it.
- Click on "Software update"
On the bConfig screen, you will see if an update of your ConnectHub or ConnectHub GEO is necessary. If an update is not necessary, you can stop the process here. If an update is required, please continue this tutorial.
Quick tip : If you have multiple ConnectHub or ConnectHub GEO, update them all at the same time. This will enable you to gain time by not having to check the version of all ConnectHub or ConnectHub GEO.
2. Get the correct version
If an update is necessary, you can grab the new version of the software. The version you need depends of what type of hardware you have.
If you have a ConnectHub or ConnectHub GEO, you can download the latest version on our Community Forum. Make sure to download our latest ConnectHub or ConnectHub GEO software. You will download a file ending with the .zip extension.
If you have another vehicle from Boschung equiped with a Vpad2, please contact us for any other vehicle type
If you have a spreader or any other type of hardware, please refer to your documentation or reach out to your contact at Boschung to learn how to do the update.
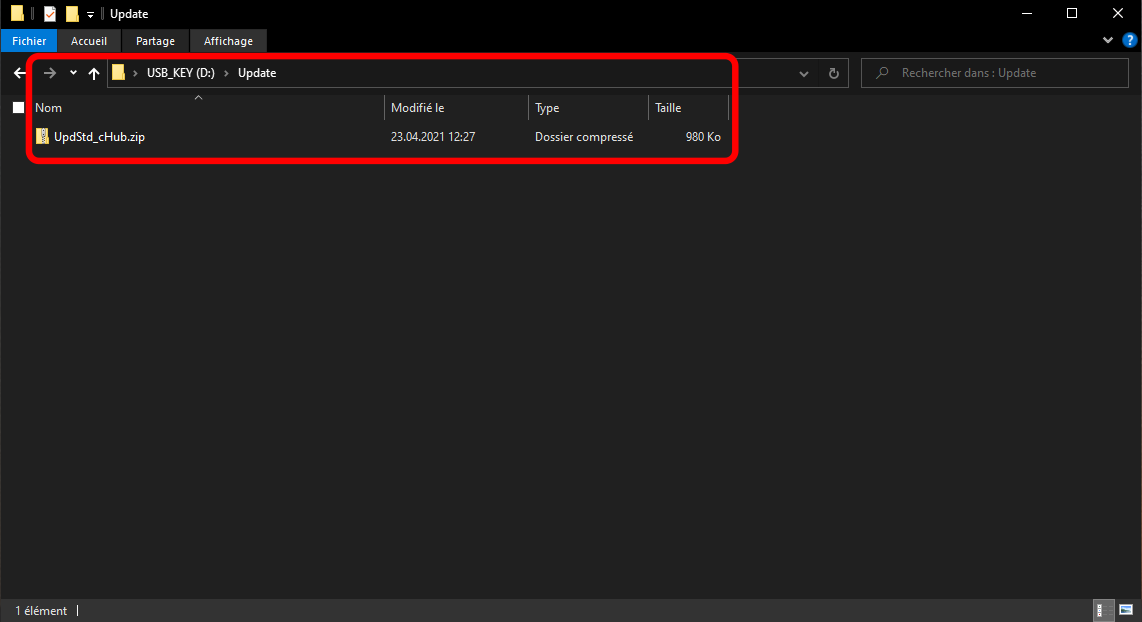
3. Put the downloaded .zip file on an USB Stick
Once you have downloaded the .zip file, you need to put it on an USB Stick.
- Grab any standard USB Stick.
- If there is files or folders on it, erase everything from the USB Stick. You will need a empty USB Stick to start the process. We strongly recommend formatting your USB Stick.
- On your empty USB Stick, create a folder named Update (with a capital U).
- Place the .zip you just downloaded in your Update folder.
With your USB Stick prepared with the Update folder and the .zip file in it, you are now ready to update your ConnectHub or ConnectHub GEO. You can do as many ConnectHub or ConnectHub GEO as you need with the same USB Stick. You only need to do part 1 to 3 of this course when a new version of the software is available.
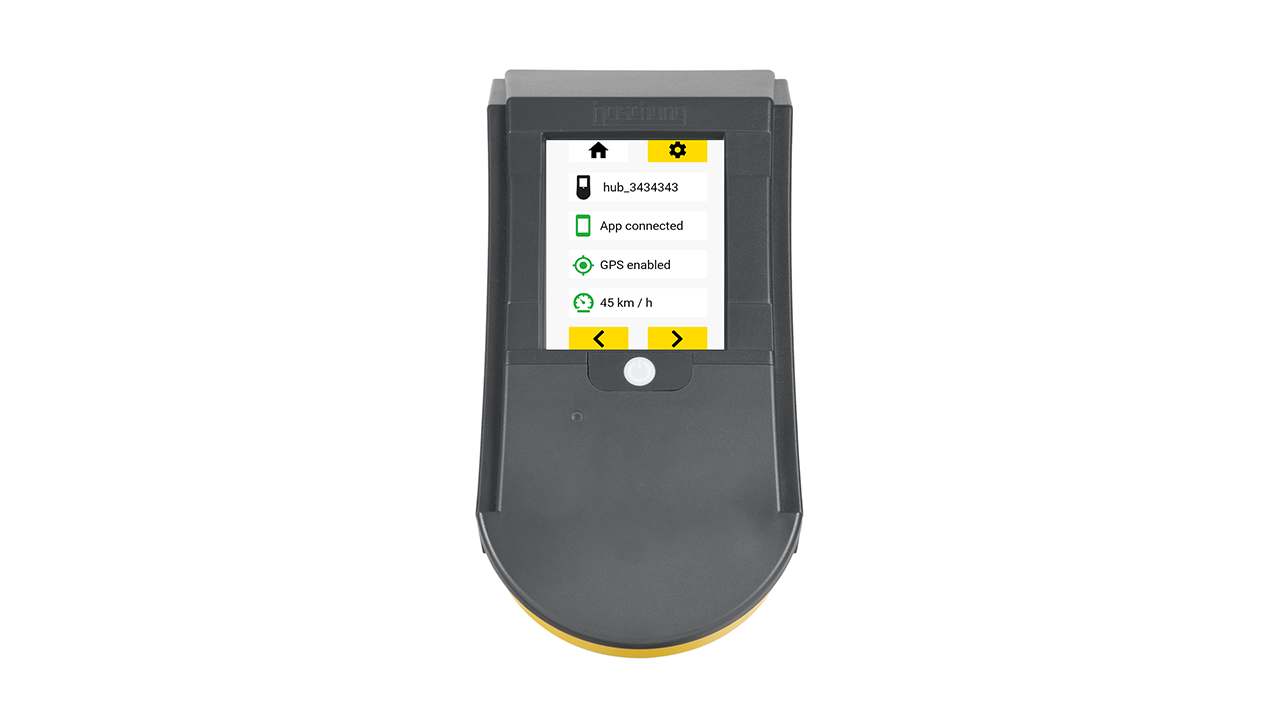
4. Plug the USB Stick on the ConnectHub or ConnectHub GEO
You can now plug your USB Stick in your ConnectHub or ConnectHUB GEO. You will find the USB port at the back of your ConnectHub or ConnectHUB GEO. If you followed the installation procedure, you will be able to access this port without having to unmount your ConnectHub or ConnectHub GEO from its support.
5. Launch the update from the ConnectHub or ConnectHub GEO
When you have the USB Stick pluged in your ConnectHub or ConnectHub GEO, you can launch the update through a few simple steps.
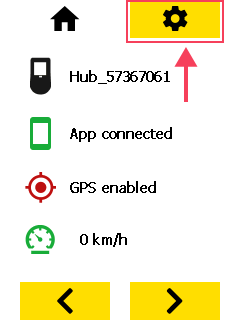
- Start your vehicle to turn on your ConnectHub or ConnectHub GEO.
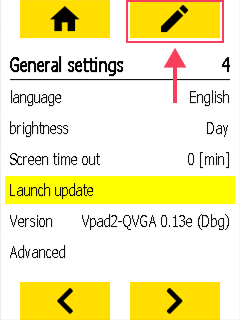
2. On the ConnectHub menu, click on the upper right settings icon. 
3. In the settings menu, navigate to the update element with the two bottom buttons. 
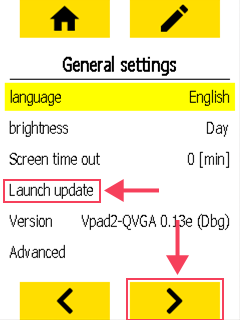
4. When the update element is highlighted in yellow, click on the upper right edit icon. 
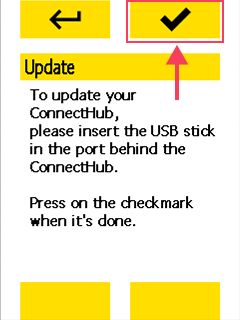
5. In the update page, read the on-screen instructions and click on the upper right checkmark icon to start the update. 
- Wait for the update to be finished. Your ConnectHub or ConnectHub GEO will restart when the update is over.
- Stop your vehicle to turn off your ConnectHub or ConnectHub GEO.
The update of your ConnectHub or ConnectHub GEO is now done. If you have more ConnectHub or ConnectHub GEO, you can keep your USB Stick and start the process again with step 4.