Thank you for using our ConnectHub or ConnectHub GEO. This quick start guide will help you install and set-up your ConnectHub or ConnectHub GEO..
Before starting, make sure to :
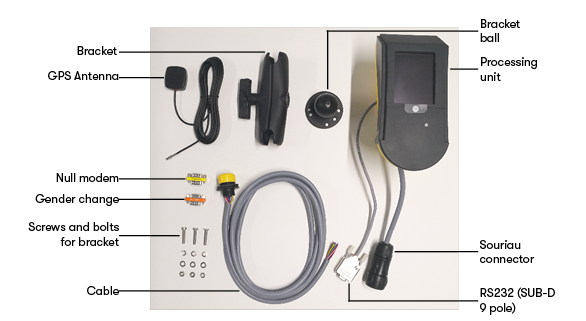
- Check that the material received is complete. You will find a list below.
- Create your bMoves account if you haven’t already done so.
- Install the bMoves and bConfig applications and make sure you have access to them. Contact your administrator if necessary.
If you run into any problem, make sure to check our online help available at www.bmoves.com/support.
Installing a ConnectHub or ConnectHub GEO in your vehicle requires some technical skills. If you don't have those technical skills make sure to contact a professionnal in your area or contact us.
Datasheet
For ConnectHub and ConnectHub GEO :
- Input voltage : 12/24 Vdc (max 5A @12V)
- Size : 195 x 90 x 80 mm
- Weight : 0.6 kg
- Operating temperature : -20... +55 °C
- Storage temperature : -40... +80 °C
- Certification : E1 10R-058198
- Display : 3.5-inch color screen: 320×240px, Resistive touch, LED backlight
For ConnectHub GEO:
- Geopositionning system : GPS, GLONASS, Galileo
Subject to technical modifications without prior notice
1. Preparation of the installation
Check that all the hardware has been received
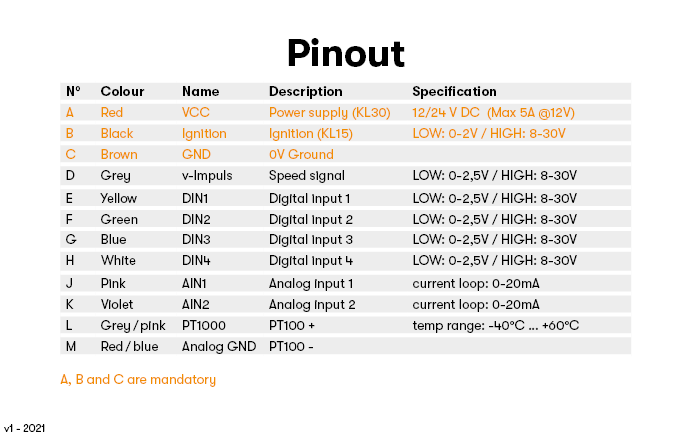
Define which inputs/outputs you want to connect
- VCC, GND and ignition inputs are mandatory
Identify the source of these inputs/outputs on your vehicle
Choose the location of the ConnectHub in the cabin
- Must not disturb the driver in his or her movements
- Must not obstruct the field of vision
- Must be installed in a waterproof location
2. Installation
Download our Wiring Scheme.
Establish the connection to the mandatory wires (VCC, GND and ignition). Observe the specifications of the vehicle manufacturer.
Connect the optional inputs, according to the wiring scheme.
3. GPS antenna installation (for ConnectHub GEO)
Mount the GPS antenna on the outside of the vehicle so that :
- There is no metal above the antenna.
- The antenna is horizontal.
- The inscription «GPS» is readable and on top
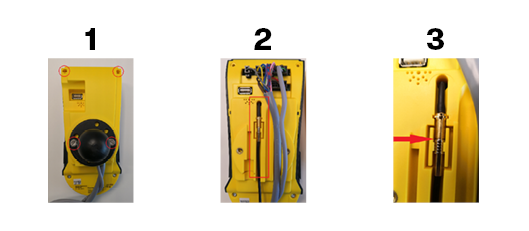
Connect the GPS antenna to the ConnectHub :
- Remove the 2 top screws that hold the cover at the back of the ConnectHub.
- Remove the 2 screws that hold the black bracket ball at the back of the ConnectHub.
- Remove the cover of the ConnectHub
- Insert the cable from the GPS antenna into the connector, making sure to push the cable all the way in.
- Close the cover
- Screw back the 2 top screws and the 2 screws of the support ball.
4. If RS232 is desired
Connect the RS232 socket (SUB-D 9 pole) to your equipment.
- The "null modem" (orange) is used to invert the input/output signals.
- The "gender change" (yellow) is required if the interfaces of the device to be captured is designed as a socket.
- Please follow your equipment manufacturer's instructions to activate the output.
5. Control
Connect the cable to the ConnectHub's connector.
Power on the ConnectHub via the ignition signal (vehicle ignition).
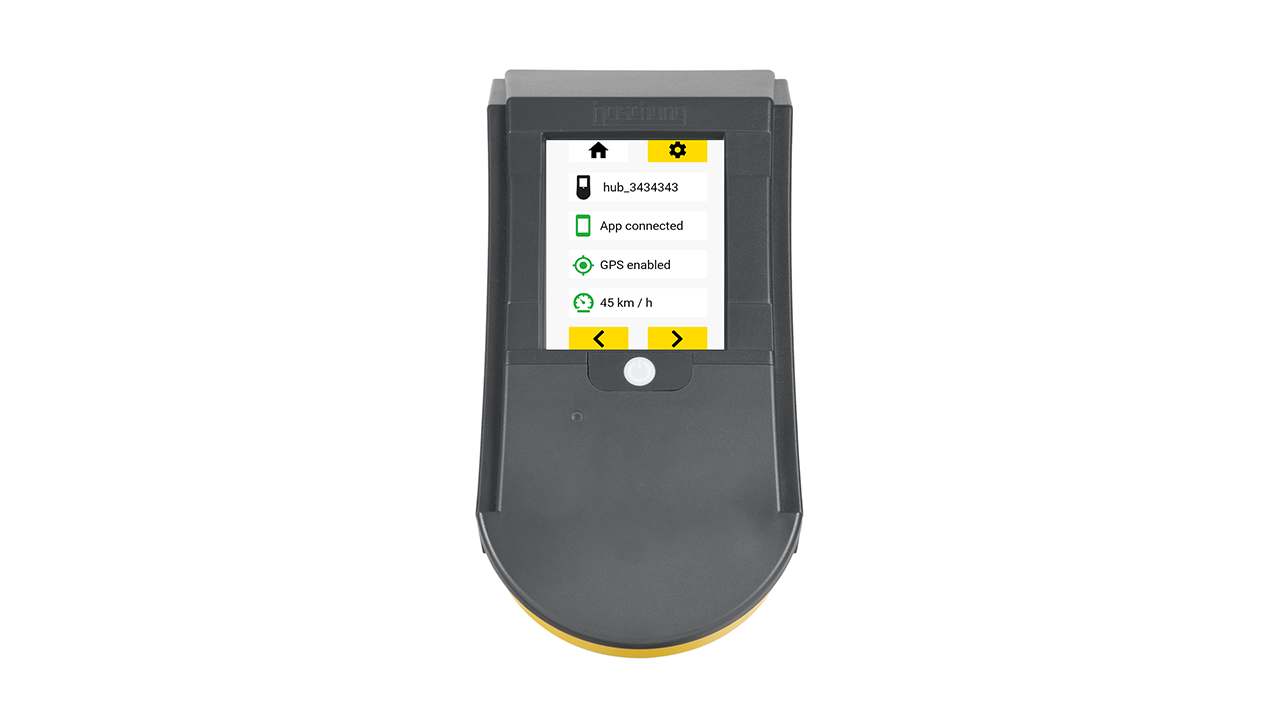
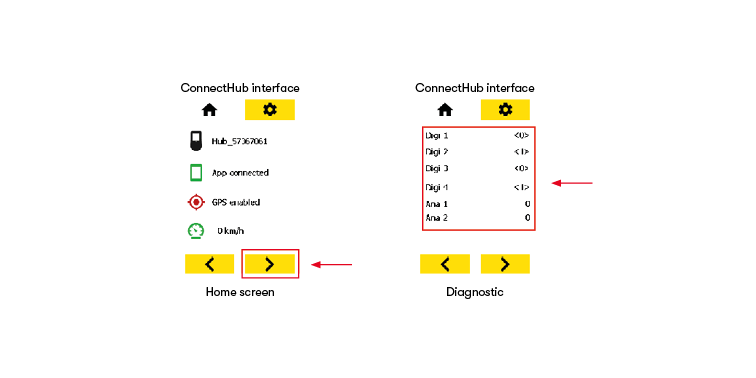
On your ConnectHub's interface, navigate with the < > arrows at the bottom of the screen to the diagnostic menu listing the signal values.
Check that the signals you want and have wired are being received correctly. If not, repeat the previous steps.
Switch off the ConnectHub via the ignition signal (vehicle ignition).
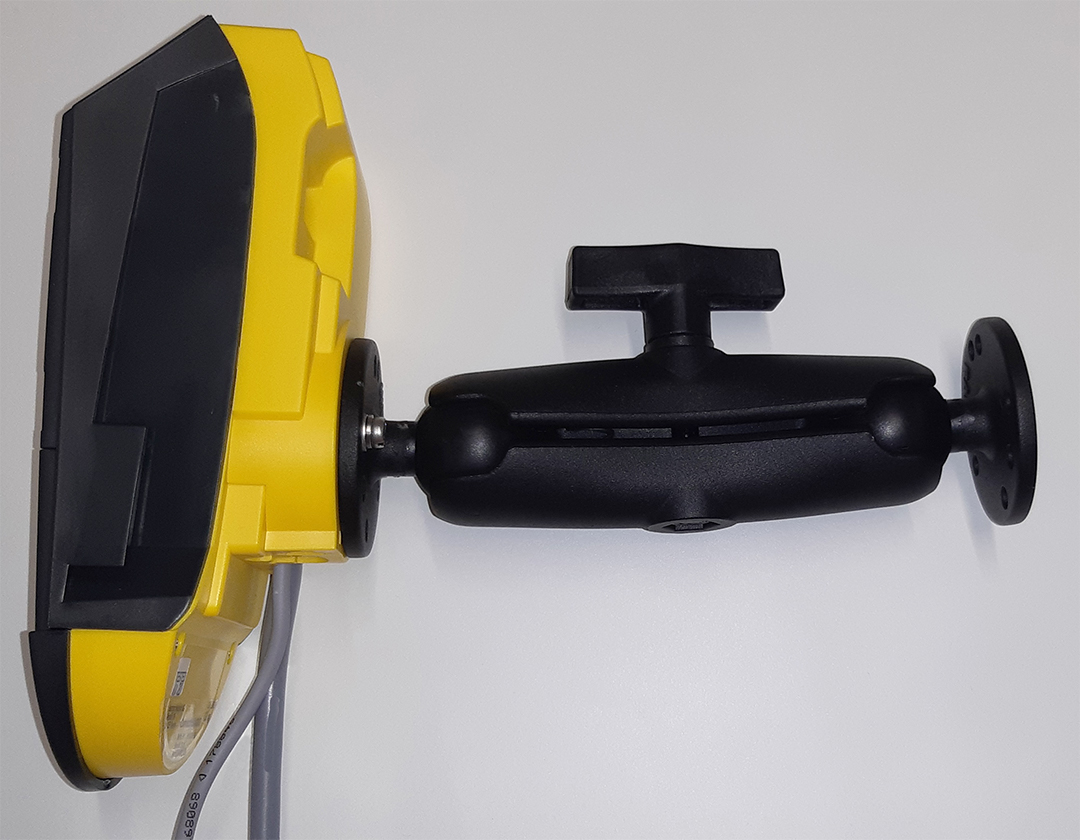
6. Fixing the support
Mount the bracket ball using the screws and bolts provided at the chosen location.
Mount the support ball on the bracket.
Mount the ConnectHub on the bracket.
Tighten the bracket sufficiently to ensure stability.
Check the stability of the installation to avoid any fall.
Configuration instructions
Once your ConnectHub or ConnectHub GEO is installed, you can proceed to the configuration.
First, make sure that your equipment and measurements have been correctly set up by your administrator on bAdmin. You can always add measurements, equipment or vehicles on bAdmin.
To learn how to set up bAdmin and how to add your measurements and equipment, follow our bAdmin formation available online.
As soon as you are ready, open the bConfig application on your smartphone and sign in with your credentials. Once you are logged in :
- Activate the bluetooth and the location in your smartphone settings.
- Power on the ConnectHub via the ignition signal (vehicle ignition).
- Press the yellow "SCAN" button to scan for ConnectHubs around you and click on the name of the ConnectHub you want to connect to (the name of the ConnectHub will appear on the ConnectHub interface).
- Once the connection is established, you will be taken to the overview page of your ConnectHub.
- The first part gives you information about the embedded software. The yellow button allows you to save the configuration in the ConnectHub.
- To configure an analog, digital or RS232 input, press the relevant element.
We advise you to check whether an update of your ConnectHub is necessary by pressing the button provided for this purpose. If an update is necessary, you can follow our training to learn how to perform this update. As for all our trainings, it is available online on our Learning Center.
- After selecting an input, you get to the measurements selection panel for that input.
- Click Add to assign more measurements to this input. Then in the list of measurements, select the measurement you have previously wired. You can assign more than one measurement to an input in case the wired equipment can be easily changed.
Setting up an RS232 input is easy. You just need to press the RS232 item in the main menu of your ConnectHub. Then you can select the right protocol according to the equipment you have connected to your RS232.
Please note that depending on the suppliers of your equipment, the RS232 output will have to be activated in their configuration. Please refer to your supplier's documentation for this task.